Software
The software is derived from my earlier LED cube, the charlieplexed version. Of course the "hardware layer" had to be changed, because physical control of the LEDs is different. But the rest is very similar.
17 December 2012
3 December 2012
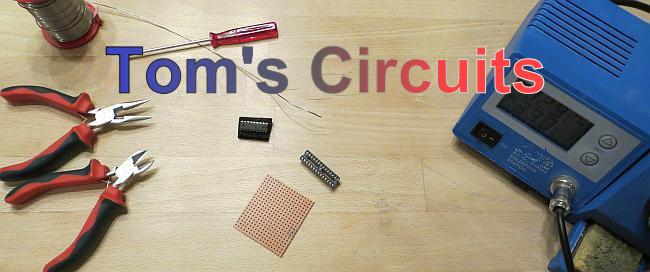
How to Build a Simple LED Cube 4x4x4 - Part 3
Connecting the Electronics
There isn't much, really. First, solder the microcontroller's socket to the perfboard, then the socket of the driver. I didn't use a socket for the driver initially, which I regretted later...
Here is a schematic.

There isn't much, really. First, solder the microcontroller's socket to the perfboard, then the socket of the driver. I didn't use a socket for the driver initially, which I regretted later...
Here is a schematic.

22 November 2012
How to Build a Simple LED Cube 4x4x4 - Part 2
Building the Cube Structure
In part one we prepared all LEDs for the assembly of the cube. Now, we start in earnest...
In part one we prepared all LEDs for the assembly of the cube. Now, we start in earnest...
How to Build a Simple LED Cube 4x4x4 - Part 1

Project Features
- Easy to build
- Only two active components (apart from the LEDs, of course)
- Includes detailed build instructions, schematics and software
Introduction
When I posted my charlieplexed 4x4x4 LED cube I did so in order to show an alternative implementation for such a cube. Its unique feature is that it only uses 9 controller ports. For some reason it gets a lot of interest from lots of people. And I had quite a few requests for schematics because people wanted to build it.
The problem with it is that it is only simple in terms of hardware requirements. But it is relatively complicated to understand its structure. So I thought I should try my hands on a really simple, easy to build LED cube and write a post including build instructions for people with basic skills in electronics.
23 October 2012
100000 Viewers!!!
Wow! According to Youtube's statistics, the video about my charlieplexed LED cube was watched over 100,000 times. Unbelievable! Unreal! Unforeseen!
Thanks for all your interest and all the positve feedback. I don't know if I will be able to top that, but I will keep trying,
Thanks for all your interest and all the positve feedback. I don't know if I will be able to top that, but I will keep trying,
20 October 2012
The Charlie Cube Mark II: 4x4x4 - Update
Update
Build this simpler version instead!
Introduction
When I wrote my post on my charlieplexed LED cube, I never meant to publish build instructions. There are plenty of instructions around and a regular LED cube is much easier to make.
Instead, I wanted to show that it is possible to use charlieplexing for such a cube. And I wanted to share my thoughts on how I got there. So I never published schematics for the cube. Also, it is relatively difficult to draw a 3D electronic structure on a 2D schematic.
But quite a lot of people asked for a schematic. So in the end I just tried my best to draw it in an understandable way. I still think that for someone with some basic knowledge of electronics it is better to try to follow my explanations in the original post. But anyway, here it is.
16 October 2012
A Charlieplexed Knight Rider Light

Features
- Low cost and low part count
- Four different flashing patterns, easily modifyable
- Speed control and pattern switching via pot
Introduction
This is nothing special, really. "Knight Rider lights" or "Larson Scanners" seem to be very popular microcontroller projects. I guess they are the next step right after the blinking LED (a.k.a. the "Hello World" program for microcontrollers).
I was recently asked if I could draw a schematic for such a device and in the end I decided to actually build the circuit. That way I could turn it into a blog post and make it available to a wider audience. The other point was that I could get my kids involved in building this.
This version is not exactly a beginner's project, because the charlieplexing is quite complex and turning the schematic into wiring can be a little confusing. So perhaps it is a good project to improve your soldering skills.
15 July 2012
The Morse Thermometer - Part 2
Reverse Engineering a Solar Lamp
Part 1 of this post is a write-up of my project for a thermometer with Morse code output. But I was not satisfied with the relatively high power consumption of the circuit, so I decided to use a solar cell to supply the circuit.
A cheap source of solar cells these days are solar garden lamps. You get them for very little money in garden centres and DIY shops. So I went and bought one. The general idea was that such a lamp would not only give me the solar cell, but also a water-tight enclosure, a rechargeable battery and a boost circuit so that all aspects of the power supply would be covered.
And the supply should be more that sufficient for my purposes, since in my thermometer, the LED would only switch on a fraction of the time. By setting the display cycle time carefully, it should be possible to supply the thermometer for 24h per day.
23 May 2012
The Morse Thermometer - Part 1

Project Features
- Extremely simple hardware
- Low-Cost
- Uses the internal temperature sensor of the ATtiny25
Introduction
I used to have one of those electronic thermometers with an outdoor sensor. That sensor transmits its readings through an RF link. Except that it didn't really work. Every now and then I had to reset the thermometer so that it would re-connect to the sensor. This annoyed me and I thought maybe I could make something that actually works.
Well, that was my excuse for this project...
7 April 2012
A USB/ISP Programmer (Part 2)
Programming Software for the USBasp
There are several interesting options, how to use the USBasp programmer. The LCSoft variant was sold with the option to download a program called ProgISP V1.72 from the vendors site. Also, a schematic was available as well as the drivers for Windows. Installation was no problem. I found no user manual in English, but usage of the software is fairly straight forward.
6 April 2012
A USB/ISP Programmer (Part 1)
Introduction
When I started this blog I meant to do so mainly in order to document my own projects. I found that when I wanted to re-use parts of one of my projects I sometimes couldn't remember why I had made certain decisions. So I needed to document my work. And if anyone else could benefit from it, why not publish all in a blog?
But I never intended to bore anybody with my opinions on anything. This post is an exception, because I think I came across someone's project (or product) I really like. It is open source, so you don't have to buy anything. Also, I won't post any links to a store, etc.
How I flash my Firmware on 8-bit Atmel Controllers
I made my first steps in the old days, when PCs used to have a serial port. And my first programmer was a ponyprog serial programmer. It worked well, but some time later I decided to buy the STK500 from Atmel. This allowed me to use all existing programming modes and to directly flash from the AVR Studio. For a very long time, this was my main development tool. And it still sits on my desk. But it has disadvantages. It isn't really mobile. It needs a mains power supply. And nowadays you need a USB-to-serial converter to connect it.
I sometimes write programs on my netbook. So the way to go these days is to use a USB based programmer. There are lots on offer. But I found one that suits my needs really well. It is based on the USBasp project. This is an open source USB programmer, which is small and simple. It gets powered and controlled by the USB port. It uses standard components (e.g. an ATmega8), so you can build it yourself. A piece of perf board will do, really. Although various optimised layouts are available for download, if you want to make a PCB. Kits are available, too.
But what really surprised me was the fact that some Chinese companies manufacture USBasp compatible hardware. They are sold through the well known channels. And you can get them for almost no money. I bought two different devices for under 3 € each. And this includes shipping!
I don't know how they can sell them at such a low price. As an end user I would pay more than 4 € for the components, let alone shipping. This was an offer I could not resist, so I ordered two different versions, apparently from different manufacturers.
The Hardware
And this is what I got after waiting for a couple of weeks:

(top view)
Subscribe to:
Posts (Atom)


